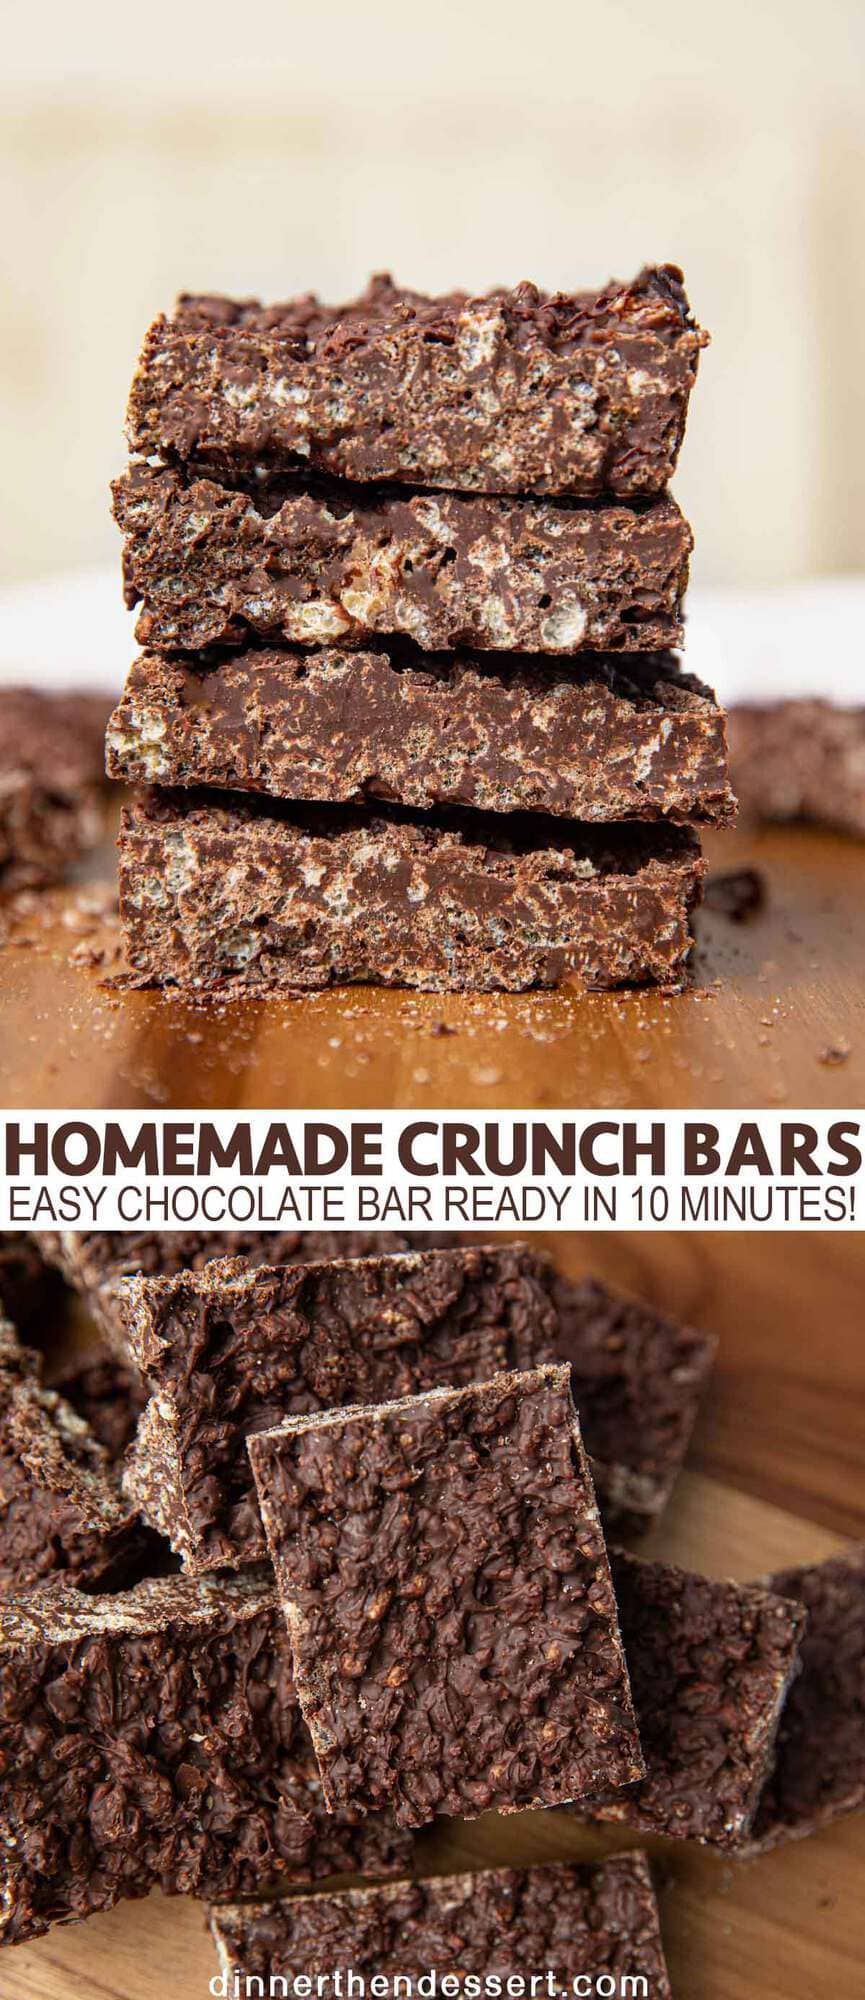
Homemade Crunch Bars are an easy candy bar made with Rice Krispies Cereal, chocolate chips and just a touch of sea salt made in just 10 minutes! You’ll never buy the pre-made version again.
If you like desserts like Rice Krispies Treats and rich Chocolate Fudge, you should try out this recipe for a dessert based on one of the world’s favorite candies. Crunch bars have been around since the early 1900s and are a great snack to grab on the go.
 CRUNCH BARS
Are Crunch Bars your favorite candy bar? Even though you can find Crunch Bars in almost every grocery store in the United States, if you’ve got a craving for creamy milk chocolate and crisped rice but don’t feel like leaving the house you can try my recipe for a homemade version.
Orrrrrr if you love them but you’ve always felt like they would be WAY better if they weren’t milk chocolate, you’ve come to the right place.
The nice thing about making chocolate bars yourself is that you know for a fact that there are no artificial flavors or preservatives in them, unless you happen to have a huge vat of soy lecithin on hand you’ve been trying to get rid of (which raises a lot of questions).
The main reason I like to make this chocolate bar at home is I prefer to use a semi-sweet chocolate for the candy bar instead of milk chocolate! The flavors are so much more pronounced and with just a touch of sea salt added in, this easy recipe may just be your new favorite dessert.
Now don’t get me wrong, if you want to make this the original way, you melt milk chocolate chips then fold them into rice krispies cereal and allow it to re-harden. Voila, perfect copycat of Original Crunch Bars!
The nice thing about this dessert recipe is that you can easily store crunch bars in the fridge to keep them good for a very long time. You can also customize them easily, so if you’re craving fluffy marshmallows or chopped nuts you can easily add them in to make my recipe your new favorite candy.
HOW TO MAKE HOMEMADE CRUNCH BARS
- Start off by lining a baking pan with parchment paper.
- Melt your chocolate chips in a microwave in 30 second increments.
- Once the chocolate chips are completely melted, pour it into a large bowl and stir in the rice cereal.
- Spread the mixture over the parchment papered pan.
- Sprinkle sea salt over the top and put the whole thing in the fridge.
- Let the crunch bars sit until they have set and then slice them into bars and serve them up.

Create a free account to Save Recipes
VARIATIONS
- Dark Chocolate: try using dark chocolate chips instead of milk chocolate or semi-sweet. You can also melt dark chocolate and white chocolate together in a swirl pattern to give your crunch bars a cool marbled look.
- Mix-ins: before you put the batter into the fridge, mix in peanut butter, melted caramel, extra chocolate chips or peanut butter cups, chopped nuts or mini marshmallows to give your crunch bars a personal touch.
- Fun Size: after the mixture has set in the fridge and you’re ready to cut it up, instead of slicing it into bars cut into bite sized squares. These “fun sized” pieces are perfect served on top of Vanilla Ice Cream.
History of the Crunch Bar
- Nestlé is a Swiss company that was founded in 1866, which makes it older than milk chocolate.
- The crunch bar was invented in 1928 and it became Nestlé’s best selling candy bar in the United States in 1994.
- In 2013, Nestlé announced a plan to responsibly source chocolate at the National Confectioners Association’s Sweets & Snacks Expo in Chicago. Rumors also started around then that a lot of Nestlé products would no longer be available in the United States.
- Nestlé sold the rights to the Crunch Bar to Ferrero, the Italian company that makes everything from Kinder Eggs to the aptly named Ferrero Rocher, in 2018.
- The Hershey Company has a similar product called a Krackel bar that was invented in 1938. It’s basically the same thing, because who can argue with how well chocolate and crisped rice go together?
The history of the Crunch Bar is basically a chocolate bar soap opera. A delicious one.

How to Store Homemade Crunch Bars?
- Serve: Mass produced Crunch Bars have a ton of sugar and almost no moisture in them, which keeps them from growing bacteria for a long time. They also have preservatives in them to increase their shelf life. Since homemade Crunch Bars don’t have either of these things going for them, you should keep them refrigerated to make sure they stay good for longer. Plus, no one likes a melted candy bar.
- Store: Chocolate candy bars can stay good in the fridge for up to 12 months. Because these ones are homemade, please eat them within 2 weeks.
- Freeze: You can freeze these Crunch Bars for up to three months (make sure they’ve hardened in the fridge and cut them into bars first!) They defrost well if they’re contained in something airtight, and stay fresher longer.
More Delicious Candy Recipes:
- Peanut Brittle – The perfect homemade candy for gifting!
- Chocolate Truffles – only three ingredients!
- Chocolate Fudge, Peanut Butter Fudge– It wouldn’t be Christmas without fudge!
- Chocolate Turtle Candies – Don’t ever buy these, they’re so easy to make! Or make these cheat version Pretzel Turtles.
- Salted Caramels or Chocolate Covered Caramels – Caramels are a labor of love, but they’re so amazing and buttery when homemade!

Homemade Crunch Bars
Ingredients
- 24 ounces chocolate chips 2 bags
- 4 cups Rice Krispies Cereal
- 1/4 teaspoon kosher salt (optional)
Instructions
- Line an 8x8 baking pan with parchment paper.
Melt the chocolate in a microwave safe glass bowl in 30 second increments, stirring each time, until full melted.
- Fold in the cereal until full coated then pour into your 8x8 baking dish.
- Spread the mixture out evenly and sprinkle over the kosher salt.
Refrigerate for at least 20 minutes until the chocolate has completely hardened before slicing with a very sharp knife to avoid crumbling.

Actually, lecithin is an emulsifier, not a preservative. It’s purpose is to keep water and oils mixed. It’s also used as a supplement to lower cholesterol
Which chocolate chips are used- semi sweet? Milk chocolate? Or is it just based on preference?
You can use whatever you prefer 🙂
To double this recipe would a 9×13 pan work? Looks delicious and cant wait to make! Enjoy all your posts!
Yes, that would work. Enjoy!!
These were some of my favorite bars growing up. So happy I can make them at home now. So good!
I’m so glad you enjoy them!
This recipe is a total treasure!
Thanks Cindy!
Oh my, these look SO yummy!! My kids would LOVE them!!
Definitely Kid approved!
Yum! I haven’t had a crunch bar in ages! These homemade ones are heavenly and so easy to make!
Thanks so much Julie.
This was a huge hit with the kids! Really amazing!
Fantastic!!
Can you add nuts to this recipe ??
Sure 🙂